Page 1 of 50 12311 ... LastLast
Results 1 to 10 of 493

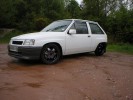
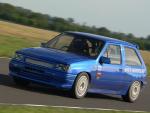
Thread: Dar's Sprint Car

  1. #1
    Small and Shiney Dar's Avatar
    Join Date
    Jul 2004
    Location
    Bellendshire Drives:DPi Edition Nova
    Posts
    6,567
    Post Thanks / Like
    Mentioned
    0 Post(s)
    Tagged
    0 Thread(s)

    Default Dar's Sprint Car

    At the end of each year when the car is not going to be used for a while. I start to take it to bits and do all the little modifications that I have decided need doing over the year. Previous years have been mostly body and suspension upgrades. However this year it was either a new gearbox and a general freshen up. Or a new engine.

    After a bit of thought I decided that a new gearbox and a freshen up was the best way to go. Whilst I was at it I could beef up the components on the car that maybe weak points, ready for all the extra power that a new engine will bring (when I build it).

    Plus there was also some more metal in the car that I wanted to get rid of. So first things first, the interior had to come out.

    That gave the kids something new to play with.

    On a side note my eldest told me that she’s getting a pink car and that she’s going to drive it faster than my car. Funny, but I hope she does.

    Anyway, I wanted to fit another exhaust system on the car and also wanted it to be bigger and more directly routed than the last one. Out came the grinder and I was off.

    Bits

    A bit of welding and some primer and were ready.

    The next bit of metal that needed to go was the insides of the doors. After borrowing a plasma cutter, we go from this.

    To this

    Then I put some edging around so that there are no sharp bits.

    Then put this in the bin
    Last edited by Dar; 31-07-07 at 07:39 PM.

  2. #2
    Small and Shiney Dar's Avatar
    Join Date
    Jul 2004
    Location
    Bellendshire Drives:DPi Edition Nova
    Posts
    6,567
    Post Thanks / Like
    Mentioned
    0 Post(s)
    Tagged
    0 Thread(s)

    Default

    I didn’t take any piccys of the internal shifter being put in, but that got put in the car.
    Then I decided that I would put the break lines inside the car. I ordered the bits from RallyDesign and put them in. Really easy job.


    Then I decided that my rear drums and shoes could do with replacing. My old ones looked horrible. New drums, shoes and bearings where ordered and they went on as well.

    I painted them in black very high temp paint, so hopefully I won’t burn the paint off of these ones.

    I then decided to take out the engine and freshen that up a little. I needed to do a cam belt change and the box needed to go to Quaife anyway.

    They come out easier than they go in!!

    Yum! My rust proofing system has been working well….read oil and grease getting thrown off of the engine and CV’s (Plus all the oil from when I blew up my gearbox at the start of the year).

    I then got some new shafts 2l to 2l and other bits to go with them. I also got a new exhaust manifold and nylon bushes all round.
    New exhaust manifold against the old one.

    The shafts made up

    New bearings in the hubs and the 2l doda’s

  3. #3
    Senior User coochiSR's Avatar
    Join Date
    Jan 2006
    Location
    Chelmsford
    Posts
    2,057
    Post Thanks / Like
    Mentioned
    0 Post(s)
    Tagged
    0 Thread(s)

    Default

    Nice one, lots of less weight

  4. #4
    Small and Shiney Dar's Avatar
    Join Date
    Jul 2004
    Location
    Bellendshire Drives:DPi Edition Nova
    Posts
    6,567
    Post Thanks / Like
    Mentioned
    0 Post(s)
    Tagged
    0 Thread(s)

    Default

    Rear bush removal

    and the new nylon ones in place

    TCA

    I did the cam belt change and made a new cover for it as well as spraying a few bits on the engine. I decided to put the cambelt cover on since I had a trip in the gravel at Donnington with Oli (DHDev) in the car. I was surprised at how deep we got and how easy it would have been to throw off the belt.

    Also, getting the manifold out etc was a pain in the butt. Also my front grill didn’t fit well because I had snapped bits off of it. So I made up a new piece for the front.

    Then it was time to sort out the fuel system. I have noticed that as the car has got quicker my fuel starvation problem got worse and my solution of just filling up the tank more and more was not working. Therefore I decided to put a swirlpot on the car and bring the fuel lines inside as well. To do this in areoquip would have cost a small fortune and I wasn’t going to spend all that money on fuel lines. So after a few enquiries I managed to find a place that could swage on JIC-6 fittings to braided hose as well as supply the bulkhead fittings as well. At a fraction of the price of the areoquip equivalent (Stronger as well). I got a swirl pot from Alloy Racing Fabrications for half the price it would cost from a mainstream place. I also decided to ditch my old fuel pressure regulator in favor of a nice little one that SBD use for all their high powered XE’s. Whilst I was ordering bits from SBD I got a fuel pump and a fuel filter. So I had all the bits I needed for the fuel system to go in.
    From the tank in to the car.

    I also decided that the fuel system was going in the front where I could get at it easily.

    My gearbox got sent to Quaife who decided to mess me around a bit. So whilst I was sorting things out with Quaife I decided that the old Nova gear linkage was pants and that a rose jointed version will have to be made.

    I was also getting bits nice and cheap from various people, so I put some stickers on the car for them.

    As well as some for myself.
    Last edited by Dar; 02-04-07 at 10:15 AM.

  5. #5
    Small and Shiney Dar's Avatar
    Join Date
    Jul 2004
    Location
    Bellendshire Drives:DPi Edition Nova
    Posts
    6,567
    Post Thanks / Like
    Mentioned
    0 Post(s)
    Tagged
    0 Thread(s)

    Default

    I managed to kill my very expensive engine loom as well. DOH! So had to contact a Motorsport loom maker to make me a new one bespoke for the car. Its been made I just need to go and pick it up.

    Anyway I finally got my gearbox back from Quaife and so it was time to start putting this thing back together.

    The ramp is dead handy!

    All the bits laid out.

    and then put together


    Many thanks to Chris for his help putting the engine and box together and also putting the engine back in the car. You can do it by yourself, but its soooo much nice to have company and Chris is a fan-bloody-tastic mechanic as well as good company.

    Engine in position

    and…….shes in!

  6. #6
    Small and Shiney Dar's Avatar
    Join Date
    Jul 2004
    Location
    Bellendshire Drives:DPi Edition Nova
    Posts
    6,567
    Post Thanks / Like
    Mentioned
    0 Post(s)
    Tagged
    0 Thread(s)

    Default

    and this is the current state of play. The engine is in and all toped up with fluids. I just need to pick up the new engine loom and then take it to get its new exhaust system fitted.
    Engine bay

    Interior


    and finally my new sticker donated by Chris and Jen


    You made it to the end of this post!! Well done! I didn’t think anyone would last this long reading my drivel.

  7. #7
    P N G Adam's Avatar
    Join Date
    Nov 2003
    Location
    Stoke-on-Trent
    Posts
    30,497
    Post Thanks / Like
    Mentioned
    0 Post(s)
    Tagged
    0 Thread(s)

    Default

    Top work.
    Liking the 4post ramp!

  8. #8
    User
    Join Date
    Mar 2006
    Location
    norwich
    Posts
    350
    Post Thanks / Like
    Mentioned
    0 Post(s)
    Tagged
    0 Thread(s)

    Default

    read every last part top thread mate nice work

  9. #9
    OMG! WTF? BBQ :) Lee's Avatar
    Join Date
    Jun 2005
    Location
    Newbury
    Posts
    16,724
    Post Thanks / Like
    Mentioned
    0 Post(s)
    Tagged
    0 Thread(s)

    Default

    Funny reading through that looking at all the things we decided to do to both the cars. Im glad one of thems gonna make it anyway!

    Top work as always mate.

  10. #10
    Nearly finished !
    Join Date
    Jan 2007
    Location
    Behind you
    Posts
    640
    Post Thanks / Like
    Mentioned
    0 Post(s)
    Tagged
    0 Thread(s)

    Default

    Really nice work pal, looks a proper weapon. Got any pics of where you lost the 3 inch out of the gear selector rod ?

Posting Permissions

  • You may not post new threads
  • You may not post replies
  • You may not post attachments
  • You may not edit your posts
  •