
A lot less than I thought to be honest but I will weigh it as soon as I get some scales haha


A lot less than I thought to be honest but I will weigh it as soon as I get some scales haha
Haven't got round to getting some scales to weigh the strengthening kit but I haven't forgotten!
But it a little update, something turned up today which definitely gave me motivation again!
thats right ZX9R bike carbs
havent decided what I'm going to do about the manifold yet, I was told it was running on an auto grass car or something?
So will give them a clean up and go from there, but first I will test fit before the engine comes out to check for space and decide what to do about filters and bulkhead etc...
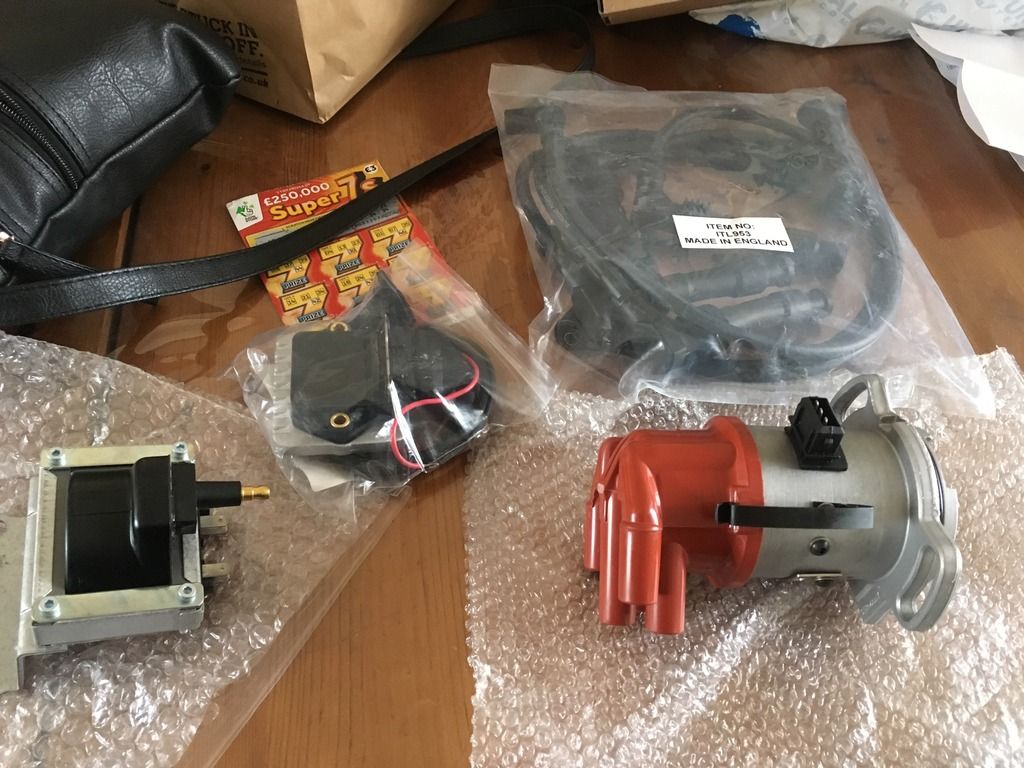
spoke to H&H ignition about a kit they do which I'm looking at and I found a fuel pressure regulator that will allow me to keep the original pump and braided fuel lines I have in place already but will reduce the fuel pressure down to 2psi
Still on the look out for cams!
Havent updated this for a while been trying to crack on for PVS so here's what iv been up to.
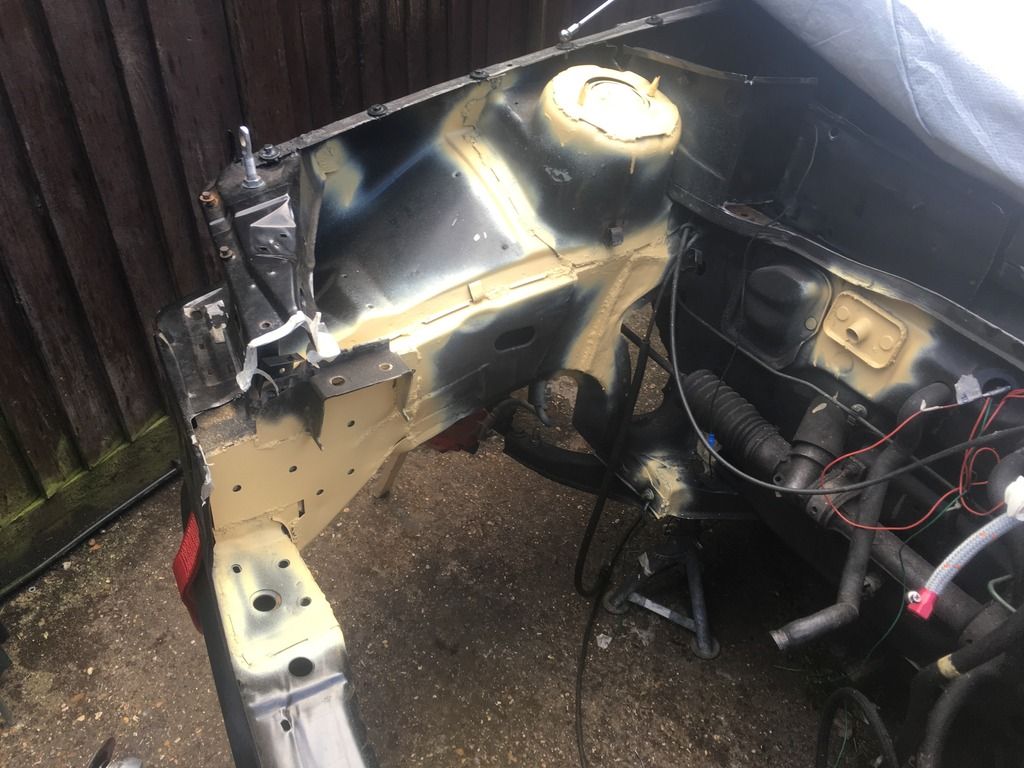
Chassis strengthening kit was first on the list, was struggling to find where they all went to start with so printed off the diagram and numbered them so may help people in the future.
Once I figured out where they all went I got them all tacked in place.
Strut tops aren't on the drawing but pretty simple where they go, I bolted them down in position to be sure of alignment this held it all in place for welding also.
Above shows Plates 1 - Drivers side chassis leg (again pretty simple to locate) and plate 4 - drivers side tie bar (remember to weld on the underside) I bolted the tie bar plate in place before welding again to be sure the hole lines up then followed the drill through the front member.
Above shows plates 2 - passenger side chassis leg and plate 3 passenger tie bar the same as the drivers side.
Plate 10 - drivers side (look inside the wheel arch and it will be obvious where it goes)
Plate 9 - passenger side (look inside the wheel arch and it will be obvious where it goes)
Theres a few I didn't get pictures of but will use people's existing pictures (hope nobody minds just for info purposes) and try and explain where they are.
Last edited by ABoresta; 17-05-16 at 01:45 PM.


looks good need to do mine, been occupied with the daily nova and escort recently
Once all the plates were tacked in I got onto stitch welding them and the rest of the engine bay.
(ignore the pink mat haha)
new clutch plate welded on in place at a slight angle to get as much clearance as possible.
Feet up and think what I'm going to do about the bulkhead for the bike carbs, currently cut out locally so they fit until I decide what to do as I wanted to keep as much as I could to hide some wiring, windscreen washer bottle etc and I want to keep the heater blower in place too.
Then etch primer on all the plates and welds
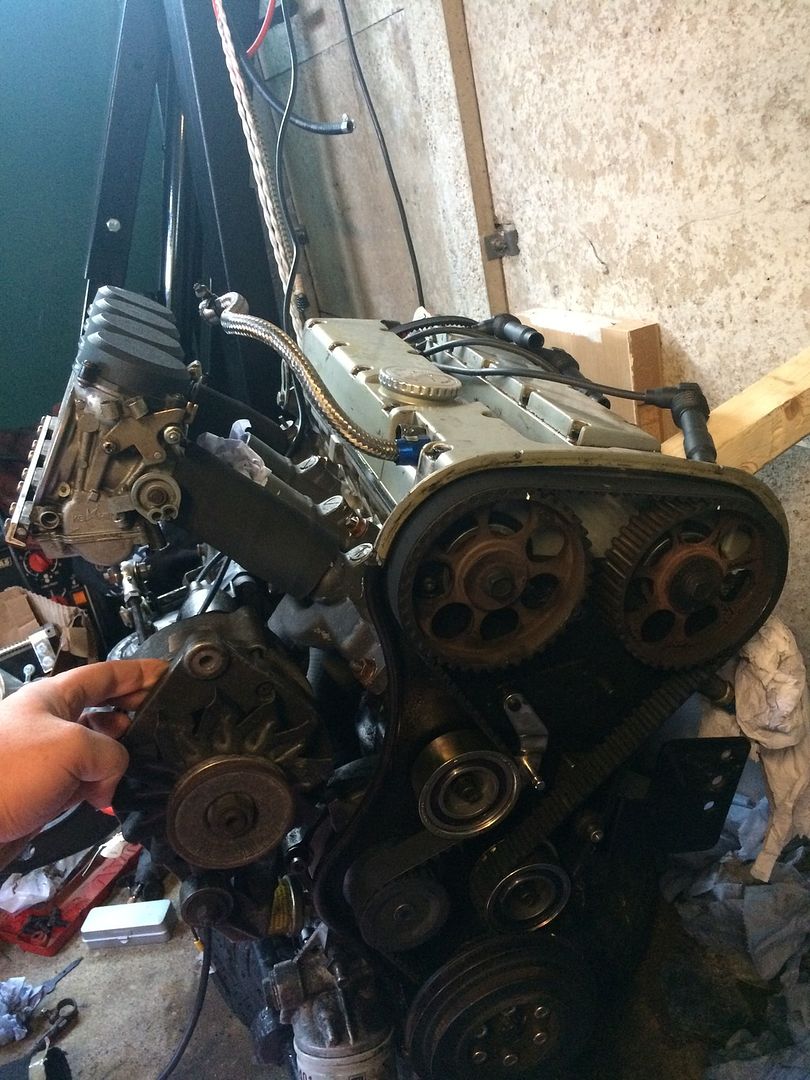
Sump gasket and arp rod bolts fitted after a cam belt, idlers, tensioner and water pump replaced (didn't bother with a picture with that it isn't interesting)
New inlet manifold fitted and found out it's a bodge and doesn't line up to the carbs when it's bolted to the engine so trying to figure out what to do right now but a test fit with some fuel hose was done just to see for now
I think they are sitting too far away but I will sort that before the engine goes back in
In the process of making some solid engine mounts with liquid casting rubber, on the shore scale apparently this is between a bowling ball and poly bushes so should be pretty tough haha, doesn't look to neat at the moment but I will tidy them up when they are done.
And my little order from H&H ignition turned up this weekend so on to fitting these bike carbs once and for all!
Finally making progress hopefully I will be ready in time for PVS!
So First step is to get the engine back in:
Sitting pretty level I think...
And the clearance for the alternator belt looks a lot better now I can fit my finger down between them
Then onto test fitting the bike carbs for the first time :D
They get a bit close to the heater blower motor but I want to keep it (for now any ways) so I'm happy it just fits
And a little arty shot with my oil catch can where I'm thinking of mounting it? Any suggestions where else I could fit it?
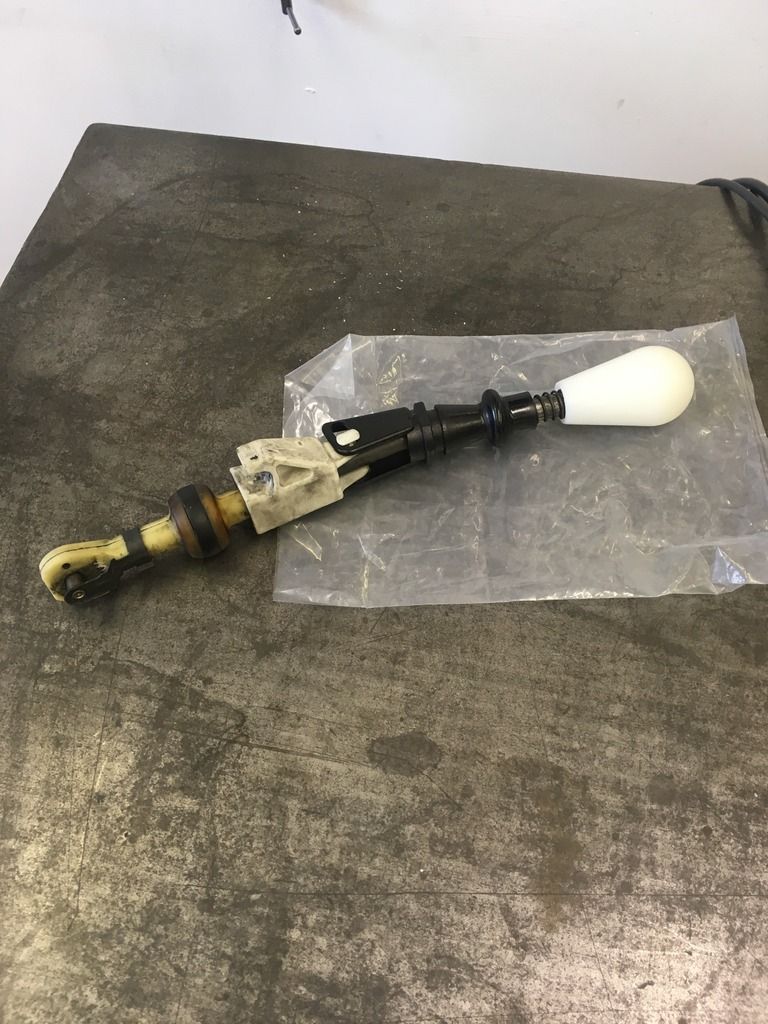
And my gear knob turned up today so I went about fitting that at work

Looking good mate you're a whizz wi the welder!

Sorry a bit late to say but the holes in the strengthening plates are for puddle welding into...
Catch tank location looks good
Posting Permissions

 Reply With Quote


