
Wed, thurs or fri afternoon any good andy? Mental moving units etc but mon and tues im picking allsorts up


Wed, thurs or fri afternoon any good andy? Mental moving units etc but mon and tues im picking allsorts up

Fitted the brakes, eventually. Hi-Spec sent the wrong pitch bolts for the hubs, they sent 12x1.75 and the hubs are 12x1.5 after an argument with them they sent the new bolts out. So they're all fitted and I'm bedding them in now so not up to full braking yet, few 100 miles before I can really stand on them. They already feel more positive than the old brakes time will tell once they've fully bedded in.
Also got the Avos I bought fitted, what an absolute shower of crap they have turned out to be. Firstly the rears had to go on without the springs and they're also shagged, it's like driving with a shotgun in the boot, every bump sounds like a gun going off, I've already ordered a set of replacement adjustable Gaz rear shocks, I'll see how I get on with them, if they're terrible I'll just do it properly and order a full set of LEDA's.
As for the fronts, the chap I purchased them from neglected to inform me that I need adjustable top mounts in order to mount the shocks. So I fitted them to the standard top mounts but had to machine the old FK top spring cups to fit the Avo springs.
Apparently this is what they should look like
So I've ordered these
Fingers crossed they'll work a bit better, and I've spoken with my rally chum about the best set-up for good turn in!! They come with a selection of top nut spacers so I'm hoping I'll be able to make it work, also got a new set of top cups delivered from Avo cos the existing ones were chewed to bits.
These should arrive by Wednesday and I'll get back to the Phirm on Friday to get them fitted and setup. Will get some pics of the brakes fitted aswell.
Head stripped of cams and ready to be sent to Phil for the port bore and the beginnings of the monster build.
Some pics of the inlet and exhaust ports for reference.
Bit of a dull update but it's coming together slowly.
So, It's been a while, for anyone who cares and those that don't.
Done a few things that haven't got pictures.
Fitted Gaz shocks on the rear and Gaz coilovers on the front with solid rose jointed top mounts. Made a big difference.
Fitted the Hi-spec 4 pots front brakes with 283mm discs. These didn't feel right from the start, I found this was mainly to do with the oil pouring out of the crankshaft oil seal on the timing end onto the inside of the drivers side brake disc!!
Didn't have the tools for this so got Liam Poulton to do it for me at his unit, he did a good job, changed the cambelt too and fitted a new alternator belt. very well priced aswell.
With that done I also discovered that a CV boot was destroyed and 2 others had no clips on them at all, causing CV grease to cover the inside of the passenger side brake disc, that would explain the brakes feeling less than adequate. Now the CV boots are sorted and the Crank seal is sorted the brakes feel like they should!!
Throttle bodies went on today, after a lot of planning, I got the bits together, fittings and such.
Standard engine running
Induction removed
Used the end off of my large crowbar as a bung for the redundant inlet manifold coolant supply
Tidied up some of the loose wires, there were frayed and damaged wires flying about, all of the wiring will be replaced during winter re-build
Throttle body mock up, check everything will fit
Loom mock up, making sure there are no loose wires hanging about the place
All connections being made in the glovebox for now, during winter re-build, I'll move the ECU into the glovebox.
FPR with mounting bracket
Coil pack with mounting bracket
Finished and ready for RR mapping, Running on a temporary map. Being mapped on Monday 4th August.Still got a lot of tidying to do but that can wait til winter re-build time.
Just need to wire the rad fan into the ECU so it's controlled by the ECU and I can set it to come on at 85, standard driving temp is 76 so 85 will be just about right.
Coming along nicely there mate, good work!
So after fitting the TB's I had a bit of an oil leak, this was caused by the fact I had rather stupidly blocked both breathers, not sure where my brain was when I did this, however I've paid the price.
Sump was leaking, so we dropped that off and replaced the gasket and refitted but it wasn't so simple.
For some reason, that I cannot for the life of me work out, the idiot that built this engine (before I owned the car) thought that using 8 washers on the sump bolts instead of just cutting the bolts down to length was acceptable.
With the correct bolts now in place we refitted the sump and alas it was knackered cracked in 2 places, while looking under the car we noticed that both driveshaft seals were leaking and that there was oil on the back of the flywheel.
Off with the box, to find that the input shaft seal was done for here aswell, gearbox oil all over the clutch. I got bored at this point and sent the box up to Paul at Helical Gearboxes in Brockley South London, 24 hours later I collected a fully rebuilt gearbox, with a brand new gear set installed.
I ordered a steel sump too and new clutch and rear crank seal.
Flywheel back on and new clutch
-
Steel sump on, with some anaerobic sealant on it.
Oil breather seperator fitted and plumbed in, this is temporarily mounted to check it works as intended, once I've got the car mapped I'll get down and see Tim at the Phirm with his alloy welding skills and get the bracket cut off and welded in the right place and the excess input, that's currently blocked, welded up and put a T piece into the dipstick tube to allow the separated oil to get back to the sump.
And here sitting in the bay, doesn't look out of place.
While the box was off I took the opportunity to make up a rose jointed gear linkage, this has turned changing gear from something vague and a bit seat of the pants to a really positive engagement, really recommend this mod.
Also sprayed a couple of coats of high temp paint on the manifold, not the greatest job but it looks a bit better than it did, I'm gonna have a stainless manifold made with quick release joints in the secondary pipes so I can drop the exhaust out and get the sump off without removing it from the head.
Note the lambda bung that we welded into this exhaust ready for the RR.
That's about it really, re-booked the RR for 22nd August, the only issue is we've still got a small leak from the sump!! Have to drop it off again and use some Threebond and one of the solid bonded gaskets cos they don't squeeze out when you tighten the bolts. Failing that I suppose I could always weld the sump on!!

Looking good, love some of the bits you've just done.
All I wanted was a Pepsi, just one PepsiFar from suicidalStill I get them tendenciesBringing back them memories
That I really miss when I reminisce

Nice work linkage looks professional. Steel sump is a good idea also
Thanks guys,
it's got the sump off again today to try and figure a way to seal it!! I think we're gonna go with the harder bonded gasket baffle plate and some proper bad ass sealant, it's getting boring now.
linkage isn't how I'd like it, could of done with tidying up and painting and also using an aluminum tube instead of the studding as a link bar, but I'll get that changed over the winter.
Rolling road is booked again now for the 22nd of this month, hopefully the sump will be sealed enough by then to get on the rollers!!
So quick update.
Sump was still sealed when we removed it, nothing had got past the sealant.
Looking a bit further we found that oil was weeping from the sealant around the crank cap on the flywheel end.
More worryingly was the gold coloured flakes we found in the fresh 30 mile old oil!!
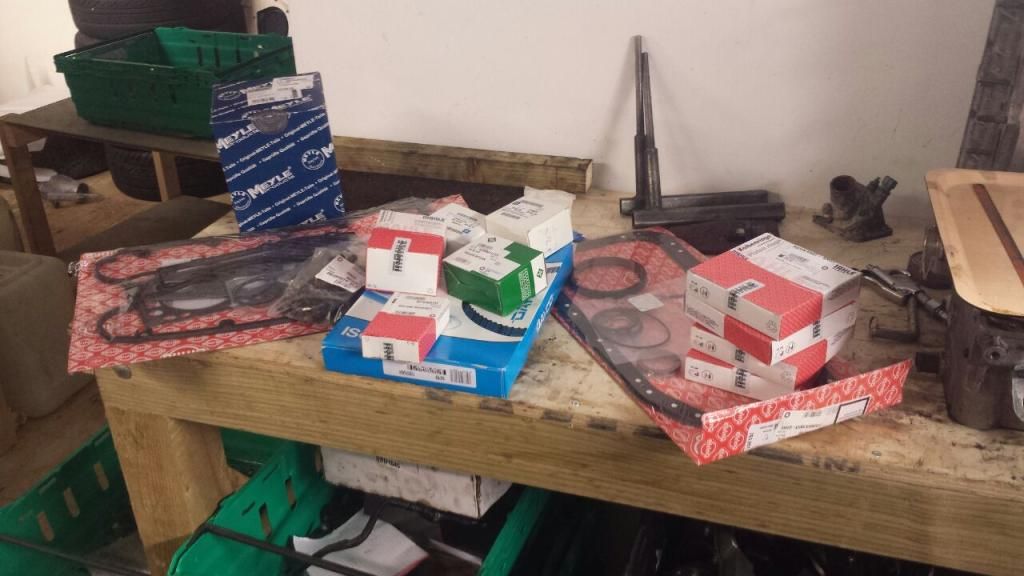
At this point I got rather bored and phone Phil at Flintshire Performance Engines, engine bought from my mate Andy £150, sent to Phil, £700 later and I've got a fully rebuilt standard engine on it's way back to me for Thursday this week, I should be able to get it in the car Saturday morning and then finally get it on the rollers and set up properly!!
Will post some pics of the engine in process from Phil when I get 5 minutes.
Few quick pics sent to me by Phil as he works on the standard engine for me, will be ready tomorrow and in the car running my Saturday lunchtime.
Posting Permissions

 Reply With Quote


