


How do you wire in the rev counter from higher spec dials?
I've seen this question posted a million times (well not quite a million) and seeing as I tackled this today I thought I'd do a basic guide. I'd rate this as an easy task to do with not many tools required. The hardest part is removing the dials.
This guides assumes you already know how to remove the dials.
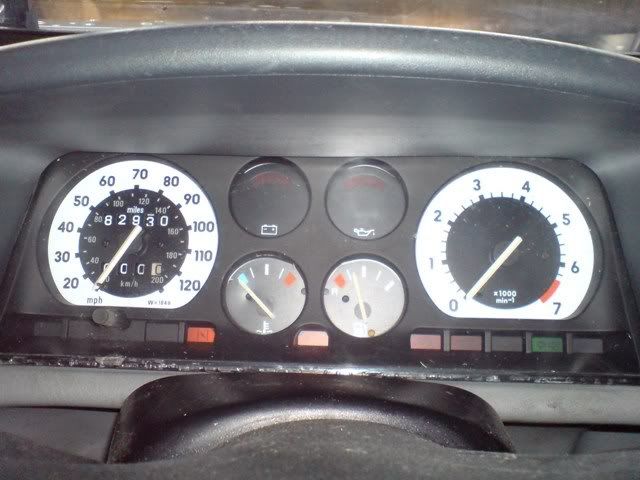
The conversion I was doing was from a mk2 poverty spec dial to a white ring SRI 6 dial clock. The same process will apply to a mk1 conversion from poverty spec to SR or GTE dials. The back of the dials may be slightly different though.
Crappy poverty spec dials
SRI white ring dials
Step 1:
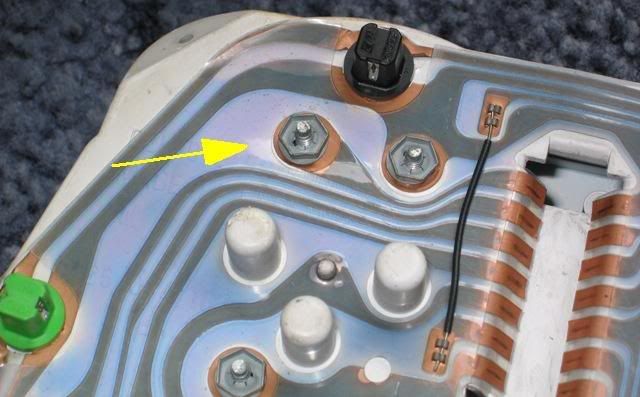
On the SRI dials the rev counter is connected to the loom via the multiplug that plugs into the back of the dials. On a poverty spec loom the connection is missing from this plug. It's possible to get a connection from a scrappy and fit it into the loom but I decided it would be easier for me to adapt the back of the dials.
The bolt arrowed in yellow is the position of the copper track that operates the rev counter. You can trace this copper track to the missing connection on the multiplug.
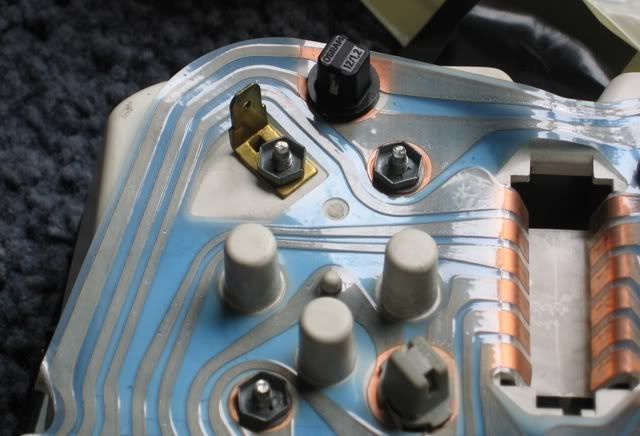
As you can see from the back of the GTE clocks below this is the result that you are trying to achieve.
Step 2:
I couldn't find any suitable metal to make a male spade connection from and after racking my brains for a while I thought about using an existing connection. I happened to have an old Nova dash clock lying around that has the same connection on the rear. After a quick dismantling I reduced the clock to the part below.
Step 3:
The next task was to cut away some of the metal (using a hacksaw or dremel) but leaving enough to get a good connection on the rear of the clocks but not overlapping the copper tracks. The red box on the picture above outlines roughly how much I needed to cut away. The metal part has a hole in the middle that was the nearly an exact fit for the size of the stud sticking out from the back of the dials. I rounded off the edges for safety.
Step 4:
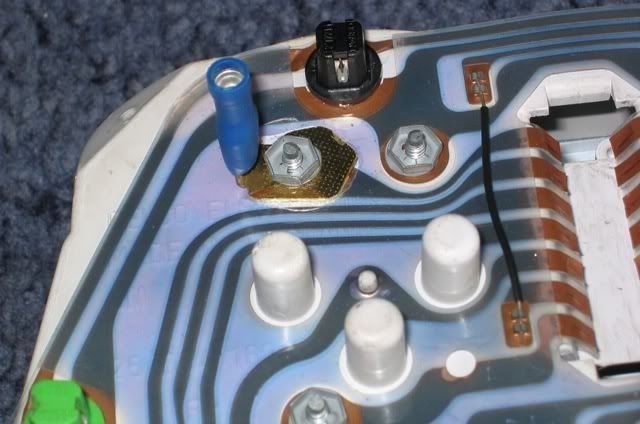
Carefully remove the cap nut from the stud (save this for later.) Using a sharp scalpel carefully cut some of the plastic away from the copper track directly underneath the connection you have made. Attach the new connection and replace the cap nut onto the stud. Its best to have this quite tight to get a good connection. Below you can see the finished article with a female spade connector attached.
Step 5:
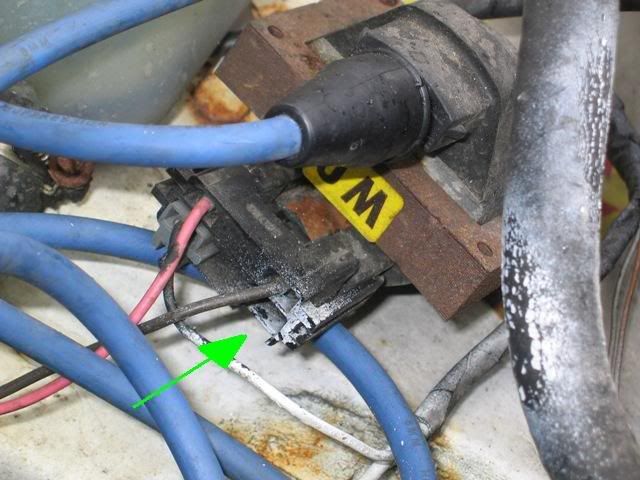
Next job is to run a wire from the back of the clocks to the spare connection on the ignition coil obviously with a female spade connector on each end.
The pic below shows the location of the empty connection, arrowed in green.
Its easiest to run the wire from the back of the dials down to the right and through the bulkhead at the existing gromet in the battery tray. The wire can then be attached to the main loom that runs across the front of the slam panel to the ignition coil on the passenger side.
The pic below shows the wire plugged onto the ignition coil.
Your rev counter should now be working perfectly.


 Reply With Quote
