Page 1 of 4 123 ... LastLast
Results 1 to 10 of 37

Thread: *how to* paint

  1. #1
    m-teqbodyrepairs.co.uk Club Member 16v Nova Kev's Avatar
    Join Date
    Oct 2007
    Location
    dumbarton
    Posts
    6,645
    Post Thanks / Like
    Mentioned
    0 Post(s)
    Tagged
    0 Thread(s)

    Default *how to* paint

    This is a guide only and it's the way I do it and it works for me.

    This is my first time painting in my garage at home, so it was just an experiment.
    This is some of the things you will need and some of the prices.


    The basics are in this pic^
    1. Sand paper in grades of 80/180/320/500. Red scotch pad 800 wet and dry £ 12 per box
    2. Fast and slow panel wipe. £20 each
    3. Filters for paint. £10 for 20
    4. Clear measuring cups. £ 12 for 25
    5. 2k primer and primer in cans. £ 30 for the 2k and £10/£15 for cans
    6. Small/ large spray gun £ 50/£20
    7. Gun wash and fast thinners £10. £30
    8. 2k clear coat. £70
    9. Stopper and filler £20
    10. Glover. not essential £5 per box

    You are also going to need a compressor in this guide I used a 50L.
    A face mask. (Essential) and also a water trap and regulator.
    If you need to use a heater use electric and not gas as it puts too much moisture into the air.
    ( cont)
    Last edited by 16v Nova Kev; 02-01-13 at 07:39 PM.

  2. #2
    m-teqbodyrepairs.co.uk Club Member 16v Nova Kev's Avatar
    Join Date
    Oct 2007
    Location
    dumbarton
    Posts
    6,645
    Post Thanks / Like
    Mentioned
    0 Post(s)
    Tagged
    0 Thread(s)

    Default

    I'm going to use the little gun as it does not use as much air or paint.


    The gun is a sealy it was only £20 and came with a cleaning kit. In the pic you can also see the small inline water trap.

    Ok so first things first. Check over you part that you want to paint and do any repairs. I will do filling dents and plastic repairs In another guide.
    I'm going to be painting a front bumper that has already been painted. You DON'T need to prime something that. Has already been painted only prime filler/ bare steel.

    Here's what I do
    1. Clean the part with panel wipe. This will take off tar/ muck and general crud
    2. If is an already a painted item you can just rub it down with red scotch pad or 500 dry make sure get into all the areas because if its not rubbed the paint won't stick
    3. Secure the item to a stand or bench that you can walk right round.
    4. Once it's rubbed down and secured clean the part with fast de greaser, use 2 cloths one you soak in degreaser and one to dry the panel. Don't just rub it with the wet one and let it dry in that's no good.


    (Cont)

  3. #3
    m-teqbodyrepairs.co.uk Club Member 16v Nova Kev's Avatar
    Join Date
    Oct 2007
    Location
    dumbarton
    Posts
    6,645
    Post Thanks / Like
    Mentioned
    0 Post(s)
    Tagged
    0 Thread(s)

    Default

    Now get your compressor on and let it build up.

    For this job I'm using solvent base ( panther black) you need to thin this paint down I usually add a third of fast thinners to it. If you thin it out too much you will need to do lots of coats.
    I transferred the paint to a clear cup and filtered it.


    Once it's filtered fill the cup up on the gun. Practice on a piece of paper to set the pressure and paint flow. Now start to paint onto your item.
    Do all the edges and apertures first then coat the lot don't go heavy
    Your not going for a Finnish your just covering it 3/4 coats is good as long as its not patchy or see through and let it dry between coats usually 10 to 15 mins.


    As its base coat it will look mat once dry.
    (Cont)

  4. #4
    m-teqbodyrepairs.co.uk Club Member 16v Nova Kev's Avatar
    Join Date
    Oct 2007
    Location
    dumbarton
    Posts
    6,645
    Post Thanks / Like
    Mentioned
    0 Post(s)
    Tagged
    0 Thread(s)

    Default

    Now it's dry you can mix up your clear coat 2k.


    The cups i bought had ratios on them so dead easy to use.


    The clear is 2 to 1 and 10% thinners. I.e 200 ml of clear to 100ml of hardener/ activator
    Then add 10% thinners
    Just apply the same as the paint do all the edges first and then all over. You only want 2 coats of clear tho 3 max too little and it will look like orange peel/ dry and too much there will be runs all over the place.

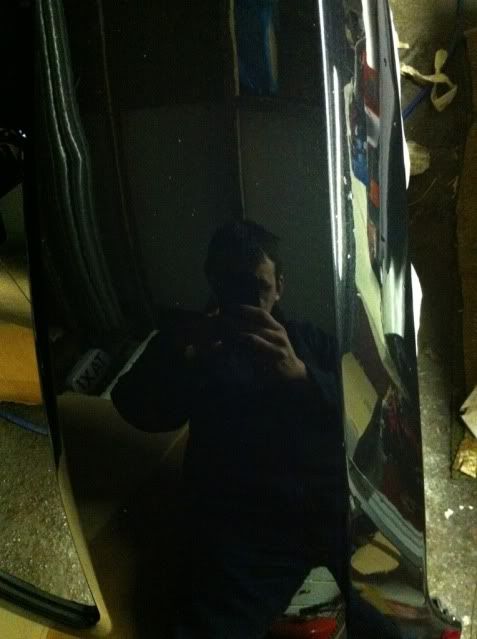
    This is 3 coats and dryed. I'm quite happy how it turned out.


    I hope this helps anybody that wants to have a go at painting.
    Last edited by 16v Nova Kev; 02-01-13 at 10:31 PM.

  5. #5
    Club Member turbojolt's Avatar
    Join Date
    Jan 2007
    Location
    derbyshire, derby, shelton lock
    Posts
    10,358
    Post Thanks / Like
    Mentioned
    0 Post(s)
    Tagged
    0 Thread(s)

    Default

    i would love to have a go painting like this, when you going to add the rough prices?
    ^^^ did you just read that? what a idiot ^^^


    PROJECT 2 FAST 2 FAT clicky


    ''lifes what happens, while your busy making plans''

  6. #6
    m-teqbodyrepairs.co.uk Club Member 16v Nova Kev's Avatar
    Join Date
    Oct 2007
    Location
    dumbarton
    Posts
    6,645
    Post Thanks / Like
    Mentioned
    0 Post(s)
    Tagged
    0 Thread(s)

    Default

    Lol just now as I forgot.

  7. #7
    Club Member turbojolt's Avatar
    Join Date
    Jan 2007
    Location
    derbyshire, derby, shelton lock
    Posts
    10,358
    Post Thanks / Like
    Mentioned
    0 Post(s)
    Tagged
    0 Thread(s)

    Default

    good stuff, got to have a go at this at some point not much more expensive then rattle cans when you add it all up, much better finish aswell


    good thread mate
    ^^^ did you just read that? what a idiot ^^^


    PROJECT 2 FAST 2 FAT clicky


    ''lifes what happens, while your busy making plans''

  8. #8
    m-teqbodyrepairs.co.uk Club Member 16v Nova Kev's Avatar
    Join Date
    Oct 2007
    Location
    dumbarton
    Posts
    6,645
    Post Thanks / Like
    Mentioned
    0 Post(s)
    Tagged
    0 Thread(s)

    Default

    Rattle cans are no good IMO

  9. #9
    Senior User
    Join Date
    Jan 2008
    Location
    Northern Ireland
    Posts
    1,673
    Post Thanks / Like
    Mentioned
    0 Post(s)
    Tagged
    0 Thread(s)

    Default

    Good on you for taking the time to make a guide.

    Is a 50 ltr compressor only good for bits and pieces or would it allow you to tackle a small car?

  10. #10
    m-teqbodyrepairs.co.uk Club Member 16v Nova Kev's Avatar
    Join Date
    Oct 2007
    Location
    dumbarton
    Posts
    6,645
    Post Thanks / Like
    Mentioned
    0 Post(s)
    Tagged
    0 Thread(s)

    Default

    Bits and pieces and panels but I think a whole car you would struggle.

Posting Permissions

  • You may not post new threads
  • You may not post replies
  • You may not post attachments
  • You may not edit your posts
  •