Page 19 of 74 FirstFirst ... 917181920212969 ... LastLast
Results 181 to 190 of 734

Thread: Craig's Xe track Nova (pb fixed to page 10)

  1. #181
    Senior User
    Join Date
    Feb 2006
    Posts
    2,618
    Post Thanks / Like
    Mentioned
    0 Post(s)
    Tagged
    0 Thread(s)

    Default

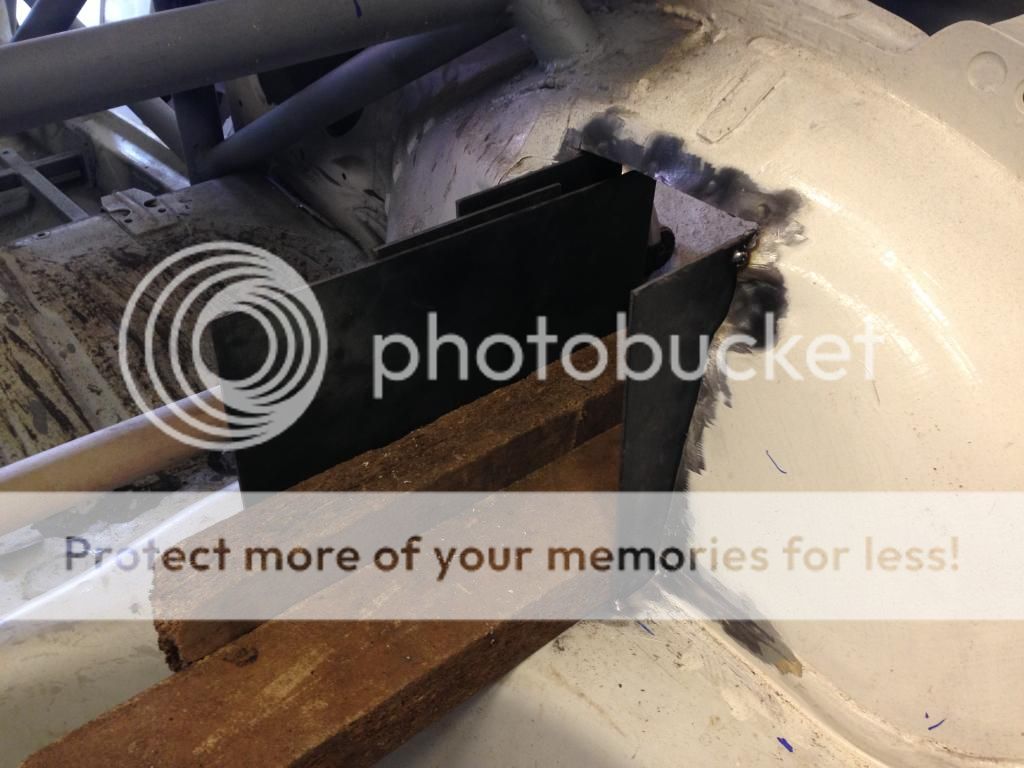
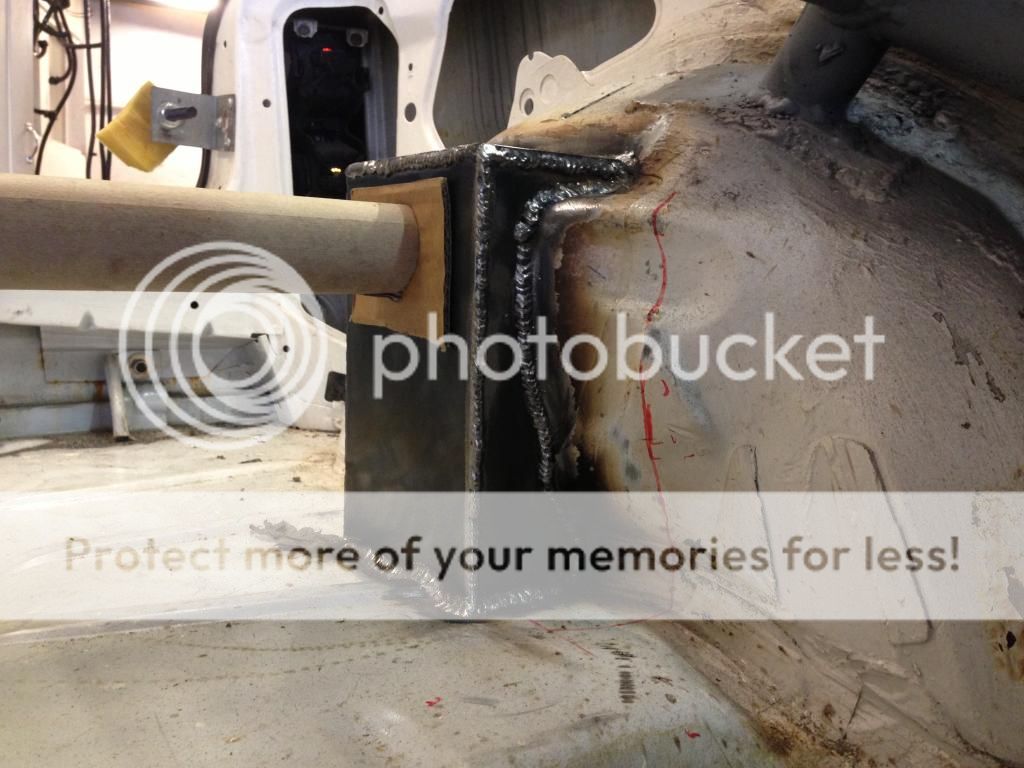
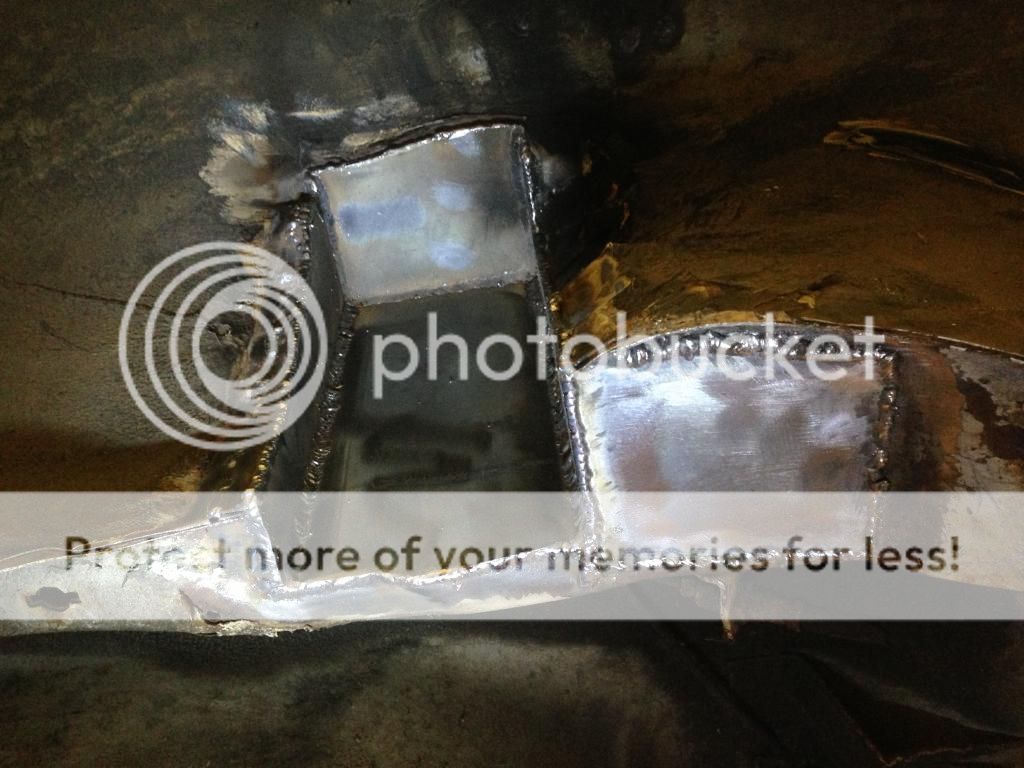
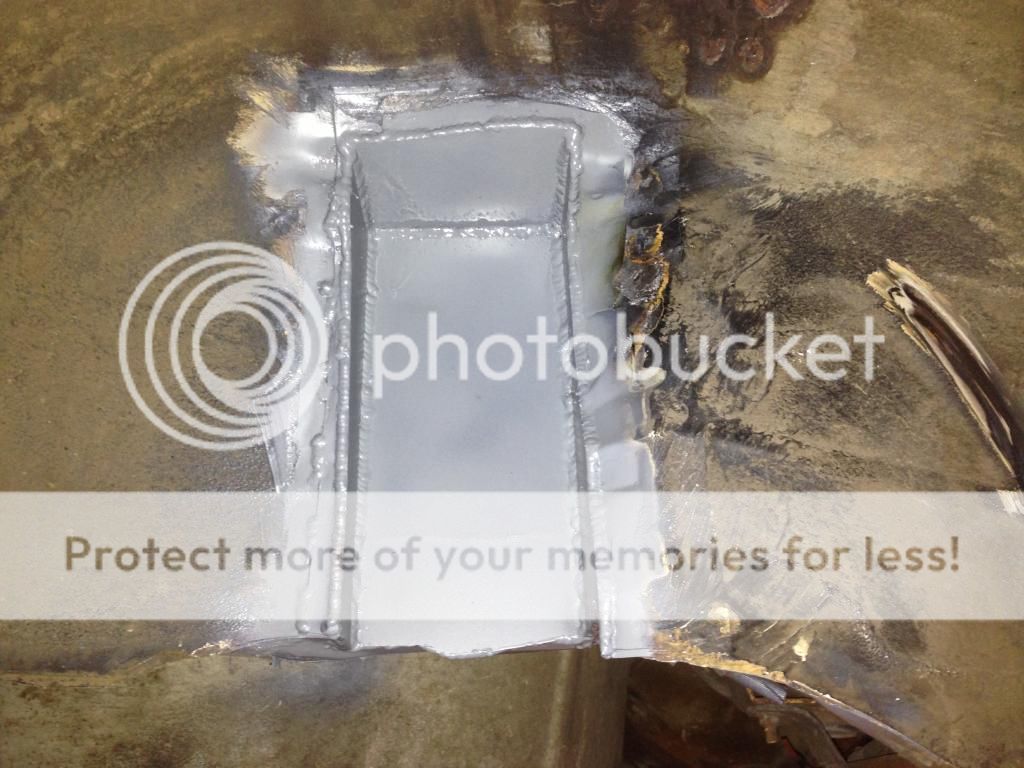
    Having turrets only that high will limit ride height & stroke. If these are purely for a coilover conversion, why not maximise the benefit by moving the turrets further back towards the boot.

    When you then make the brackets for the struts, it's possible to put them at the back of the rear beam once boxed. This will give you a far better stroke translation.

  2. #182
    Senior User
    Join Date
    Apr 2011
    Location
    wiltshire
    Posts
    1,938
    Post Thanks / Like
    Mentioned
    0 Post(s)
    Tagged
    0 Thread(s)

    Default

    It has always had Avo coilovers and even with the standard height turrets it drove fine, only doing this as the springs were so close to the inner arch and tyre wall that adjustment was limited.
    Last edited by 8valve-craig; 14-11-18 at 09:29 AM.

  3. #183
    Senior User
    Join Date
    Feb 2006
    Posts
    2,618
    Post Thanks / Like
    Mentioned
    0 Post(s)
    Tagged
    0 Thread(s)

    Default

    This is in part what i'm saying; if you're moving the mount points on the beam & the body, then why not put them in the best possible position?

  4. #184
    Senior User
    Join Date
    Apr 2011
    Location
    wiltshire
    Posts
    1,938
    Post Thanks / Like
    Mentioned
    0 Post(s)
    Tagged
    0 Thread(s)

    Default

    Because i have already cut the body and dont fancy repairing it for what will most likely make no difference on what is essentially just a track car.
    Last edited by 8valve-craig; 26-05-13 at 05:57 PM.

  5. #185
    Senior User
    Join Date
    Apr 2011
    Location
    wiltshire
    Posts
    1,938
    Post Thanks / Like
    Mentioned
    0 Post(s)
    Tagged
    0 Thread(s)

    Default

    Been out and bought some more engine bits today. Got the chance to buy this lot cheap. Only actually wanted the rods, but made an offer on the lot, Because as always it brings the price down.


    Very pleased with them. The crank is nice too, an early one which is unground, so may well use that too and sell on the lightened one i have.


    A good day, and im struggling to think of anything else i actually need now to build the engine, other than a gasket.

  6. #186
    Senior User
    Join Date
    Apr 2011
    Location
    wiltshire
    Posts
    1,938
    Post Thanks / Like
    Mentioned
    0 Post(s)
    Tagged
    0 Thread(s)

    Default

    So my plan all week was to take today off and do some work on the shell. To be honest i had started to fall out of love with it (again), and constantly found myself looking at M3's, but once i got back into it i quite enjoyed myself.

    First job was to Jack the car up a little higher, which took longer than you might think as it needs to be levelled to ensure any new additions are straight and symmetrical.
    Also then swept up the 3" of dust underneath which made a nice difference.


    Finished cutting the O/S rear turret out, but straight away found some Brown Stuff inside the chassis rail.


    I had thought this was a relatively rust free shell. I know of a few crusty bits, but nothing serious. Needless to say this bit needed addressing, so drilled off the spring seat.


    Could have cut out the bare minimum and repaired the drill holes, but decided to chop it right back and replaced with some 2mm which i persuaded into shape with a claw hammer.


    Same method for the O/S turret, although slightly more difficult as it had to match the N/S, and of course as with everything on a Nova, side to side the inner arces are different shapes.


    Roughly marking the shape of the arch with a marker.


    Plenty of pissing around, then it was in.


    I had planned to persuade a certain welder friend of mine to buzz them in for me, what with them being suspension and all that, but was feeling brave so did it myself.

    There were one or two hiccups, nothing serious, just with the welder on Max power burned through the original paper thin body once or twice which interupted the flow.


    Once finished i made a mock rear brace out of an odd cardboard tube i had. Not necessary, but gave me an idea what it might look like.


    Really really pleased with how they came out. They are spot on to the naked eye, with just minor discrepencies that you would only find with a ruler, so in my book they are perfect. Also dead pleased with the welding. I wasnt brave enough to run a bead, so used hot tacks, but they were very hot tacks so im in no doubt that they are adequate.


    And a front view. Not that it will ever be seen like this with seats fitted, just showing they are straight.


    Overall am very pleased with them. Got back my enthusiasm so either tomorrow or next weekend il buzz around them underneath, then the car can go back on its wheels.

  7. #187
    User chris gsi's Avatar
    Join Date
    Sep 2005
    Location
    gloucester
    Posts
    1,284
    Post Thanks / Like
    Mentioned
    0 Post(s)
    Tagged
    0 Thread(s)

    Default

    Good news you have got your enthusiasm back Craig.this has to be my favourite build/nova at the min some very nice work and parts going in to it. Looking forward to having a look around it when it makes a return to combe ( makes me wish I never sold my old track car)

  8. #188
    User
    Join Date
    Jul 2008
    Location
    Leeds
    Posts
    397
    Post Thanks / Like
    Mentioned
    0 Post(s)
    Tagged
    0 Thread(s)

    Default

    Excellent work there, attention to detail and workmanship is second to none

  9. #189
    Senior User
    Join Date
    Apr 2011
    Location
    wiltshire
    Posts
    1,938
    Post Thanks / Like
    Mentioned
    0 Post(s)
    Tagged
    0 Thread(s)

    Default

    Quote Originally Posted by chris gsi View Post
    Good news you have got your enthusiasm back Craig.this has to be my favourite build/nova at the min some very nice work and parts going in to it. Looking forward to having a look around it when it makes a return to combe ( makes me wish I never sold my old track car)
    Quote Originally Posted by tahir868 View Post
    Excellent work there, attention to detail and workmanship is second to none
    Thanks for the kind words, Im hoping it will be pretty special when finished.

    Had another few hours down there today. Worked really fast with no distractions and got the turrets fully welded and primed.

    First up was to buzz around the inside of the n/s. I was advised that it wasnt necassery, but did it anyway as it was easy enough.


    Before welding it into the chassis rail underneath i decided to drill off this spring seat, just as i was curious as to what might be lurking underneath, like what was on the other side. But also of course as it didnt match and looked odd.


    Really glad i did as there was a small crusty bit that needed attention.


    So quickly fasioned a repair plate for it and buzzed it in, then repaired the drill holes and fully welded the new turret into the chassis rail.


    Went round to the other side and fully welded that one too.


    And having cut the body where i did found a slither of overlap which wasnt fully spot welded, so knocked it back and stitch welded it on both sides of the car.


    And that was that. A quick squirt with Zinc Primer and left it there for the day.


    Again am pleased with my efforts, And despite it being a bit messy im sure it will be up to the job.

    Next up is to drill the tops, then box the Nova beam, which hopefully il do mid-week.
    Last edited by 8valve-craig; 23-06-13 at 06:05 PM.

  10. #190
    Senior User
    Join Date
    Apr 2011
    Location
    wiltshire
    Posts
    1,938
    Post Thanks / Like
    Mentioned
    0 Post(s)
    Tagged
    0 Thread(s)

    Default

    Did something much more therapeutic today. Its been ages since i had a tinker in my garden shed, something which i quite enjoy, so with an idea in my head i popped out to see what i could do. The basic idea was a custom rocker cover.

    I did pick this one up just recently which has (at great expense to somebody) been modified to run the Dry Sump then freshly powder coated.


    A nice cover im sure you will agree, but i dont run a belt cover, and with it being such a shame to cut it up decided to start a fresh one.

    So.... Starting with 2 covers, one of which used to be on my carb'd engine so is already trimmed on the timing belt side which is what i wanted for this new engine.


    Cut out the oil filler on the one i want to keep. (which took a serious ammount of thinking and measuring)


    And cut out a piece of the doner to start patching it up with. Note that the fixing bolt holes need to be in the right place, so cutting very carefully.


    Would have loved to have been able to cut out a whole square and do it in one hit, but the bolt holes are all very randomly spaced, so had to do it in smaller pieces.


    Second piece cut out of the donor, which again for the lower part of the square i couldn't do in one hit, as it needed a 101mm run with a bolt hole in a certain place, which just wasnt happening.


    And second chunk in.


    Even looking pretty factory on the underside at the moment


    And the third piece, by which point i was getting pretty good. This bit went in first time without a single alteration.


    Oil cap deleted. Pretty sure i know who im going to ask to weld it up for me too, so if you are reading then get ready for your phone to ring.

    Next up was to chop the spark plug trim. Just becase i always loved the look of the Swindon BTTC engines.


    And with a fillet in each of the openings, and that bottom piece welded into the cover should look something like this.


    Think i have enough material left on the donor to smooth out the rear breather step too, so will crack on with that next weekend, but not sure if im going to tackle the front one or not as it looks quite complicated.


    Obviously the inside will need welding up good around the bolt guides to eliminate oil making its way out, but im dead pleased with it so far. Should only need a very small ammount of filler, if any atall.

Posting Permissions

  • You may not post new threads
  • You may not post replies
  • You may not post attachments
  • You may not edit your posts
  •